


How to Take Exceptional Indoor Photos of Your Dog
Hi there, and hello, Gabriella here.
Today I would like to discuss some of my personal tips for taking high quality images of your dogs indoors. In a future post I will address outdoor images, but for now, we will discuss indoor images. After all, here at Home With Hound, we do love staying at home, with our hounds. Before we begin, here is a snapshot of my background with photography. I've been taking photos for the past ten years and while I do by no means consider myself to be a professional I have experience photographing weddings, portraits, product photography/still life, and of course, dogs. Now, let’s get started. Here are 6 of my top tips for taking good photos of your dogs indoors.
1. Natural Lighting

If you’ve heard it once, you’ve heard it ten times: Natural light is your best asset in photography, particularly when photographing something that moves often and quickly like dogs do. In this image we can see that Samba is well lit, as he is sitting in directly in front of a window. My favorite way to source natural light!
If you do not have a large window, or a well-lit space, use a floor lamp to add more lighting to your space. For pets, I recommend using a faster shutter speed (400 shutter speed minimum) and a smaller aperture (my favorite aperture is 1.8, and I try to use 1.4 when outdoors, but more on that in another post). This will allow for less blur in your images, but it is best to take a few test shots to figure out which settings are best for your camera, as your space will be different than mine.
2. Have a game plan

You know those candid photos that you love so much on instagram? The ones that look like the camera just so happened to click at the opportune moment? Those are likely the most planned images that you’ll see on the Internet. As you can imagine, it can be tricky to wrangle or settle down one dog, let alone multiples. So having a clear idea of the image you want to achieve ahead of time will save you a lot of time and frustration.
If you’re looking for some inspiration, just visit Pinterest, or your favorite instagram account! Once you know what you want to capture, consider your space: Taking a photo on the bed? Make sure any clothes on the floor are out of sight, and that the pillows are adjusting accordingly. Trying to capture an image in front of an interesting bookshelf or wall? Make sure to sweep your floor so that you don’t see any pesky dog hairs or crumbs on the floor in your image, and unplug everything that may be seen in the background (cords are no fun to edit out).
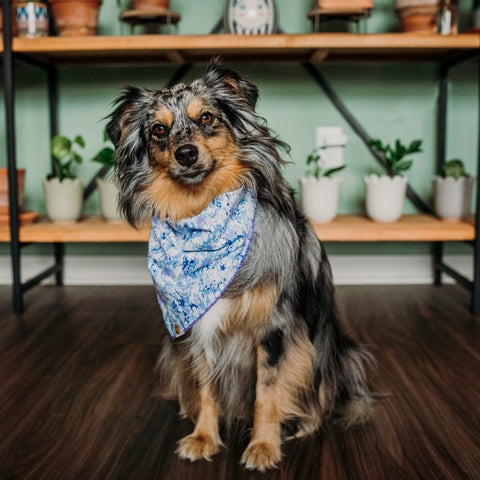
3. Less Is More, Visually

When crafting an image, consider where your eyes go when you see a pet photo that you love. What makes that special? Are those images filled with a lot of stuff going on? Do busy backgrounds distract your eye from the subject of an image? One of the reasons I prefer to use as low of an aperture as possible, is because it allows backgrounds to become soft and sharpens the focus on your main subject, drawing your audience’s eye to what you want them to look at. If you cannot find a background that has limited visual distractions, then using a lower aperture is another way to help direct your audience’s eye to the main subject in your image.
Sometimes, your background is visually interesting or aesthetically pleasing. For instance, in the photo above, Samba is sitting in front of my plant wall. While the colors of the plants add an aesthetically pleasing tone to the image, the sharpness and focus in the image is on Samba, therefore not distracting or taking away from the subject of the photo (Samba).
4. Treats!

I keep a pack of fruitables on hand for photoshoots and Reels videos. They are tiny and soft treats that I can break in half for the pups as a reward. Oftentimes I give my dogs “advance payment”. Once I have them in a position, I give them half of a treat. Then, I situate myself to take the image. I have personally found that this entices my dogs to stay in whatever position I have put them in, as they anticipate a reward for posing, as well as one for sitting still. My dogs have learned that when the camera or phone comes out, they will be getting a treat.
5. Keep it short and sweet

Dogs are like toddlers. They can have a short attention span. Gamify your photoshoots with treats (see number four), and make sure that you do not overdo it. Here you can see that Lindy is moving towards the camera. By the time I took this shot she was "done", ready for her treats, done with sitting politely. After all a photoshoot is just one big game of mental exercise for your dog. If your dog is not cooperating with a pose, go with the flow, you never know, these images will end up being your favorite ones! In this situation it is best to not push it. If you do, it will show in your images, you will end up frustrated, and your dog will be able to sense this.
6. Edit lightly
Unless you are a professional dog photographer, my personal recommendation is to keep your editing to a minimum. There are many people who dislike seeing an image that just has a Lightroom preset just “slapped” onto an image. With respect, the beauty of LightRoom is to be able to work smarter, and not harder. Personally, I believe that you can work smarter and not harder by starting with your camera settings and your image set up. When you plan ahead, consider your framing, lighting., you are doing yourself a massive favor once it comes time to edit. After many years of using LightRoom, I have a pretty fluid editing workflow. I know which preset I will use, and which tweaks I will make following that, and unless required, my image should not need any other work. Of course, this depends on where your image is going. For my instagram, because the quantity of images I need to produce is higher, I allow myself some slack on the amount of time I spend editing each image. For my website, I allow for more time and consideration to go into the details of editing a photo.
In my opinion, the most important settings to consider when editing an image, which I personally tweak after adding my LR presets (you may choose to do it before, but those settings may become changed after adding a preset to keep an eye on that) are: exposure, shadows/highlights, color balance, saturation, and clarity. I would recommend messing around with these after you have added a preset to your image, to get the right balance for your image and the feel you are looking for. It will take some practice, but once you know what you like, it will become second nature.
I hope that these tips have helped. I would love to see what photos you come up with! Next time, I will be writing about how to take a good photo of your dog outdoors.
Bandanas in this blog post:
Samba:
Lindy:


